Getting the DE1-SoC up and running
V. Hunter Adams
Note: This is mostly an abridged version of the Linux on HPS webpage with the parts omitted that will not be relevant for this semester.
Setting up the hardware
- Acquire a DE1-SoC from Hunter.
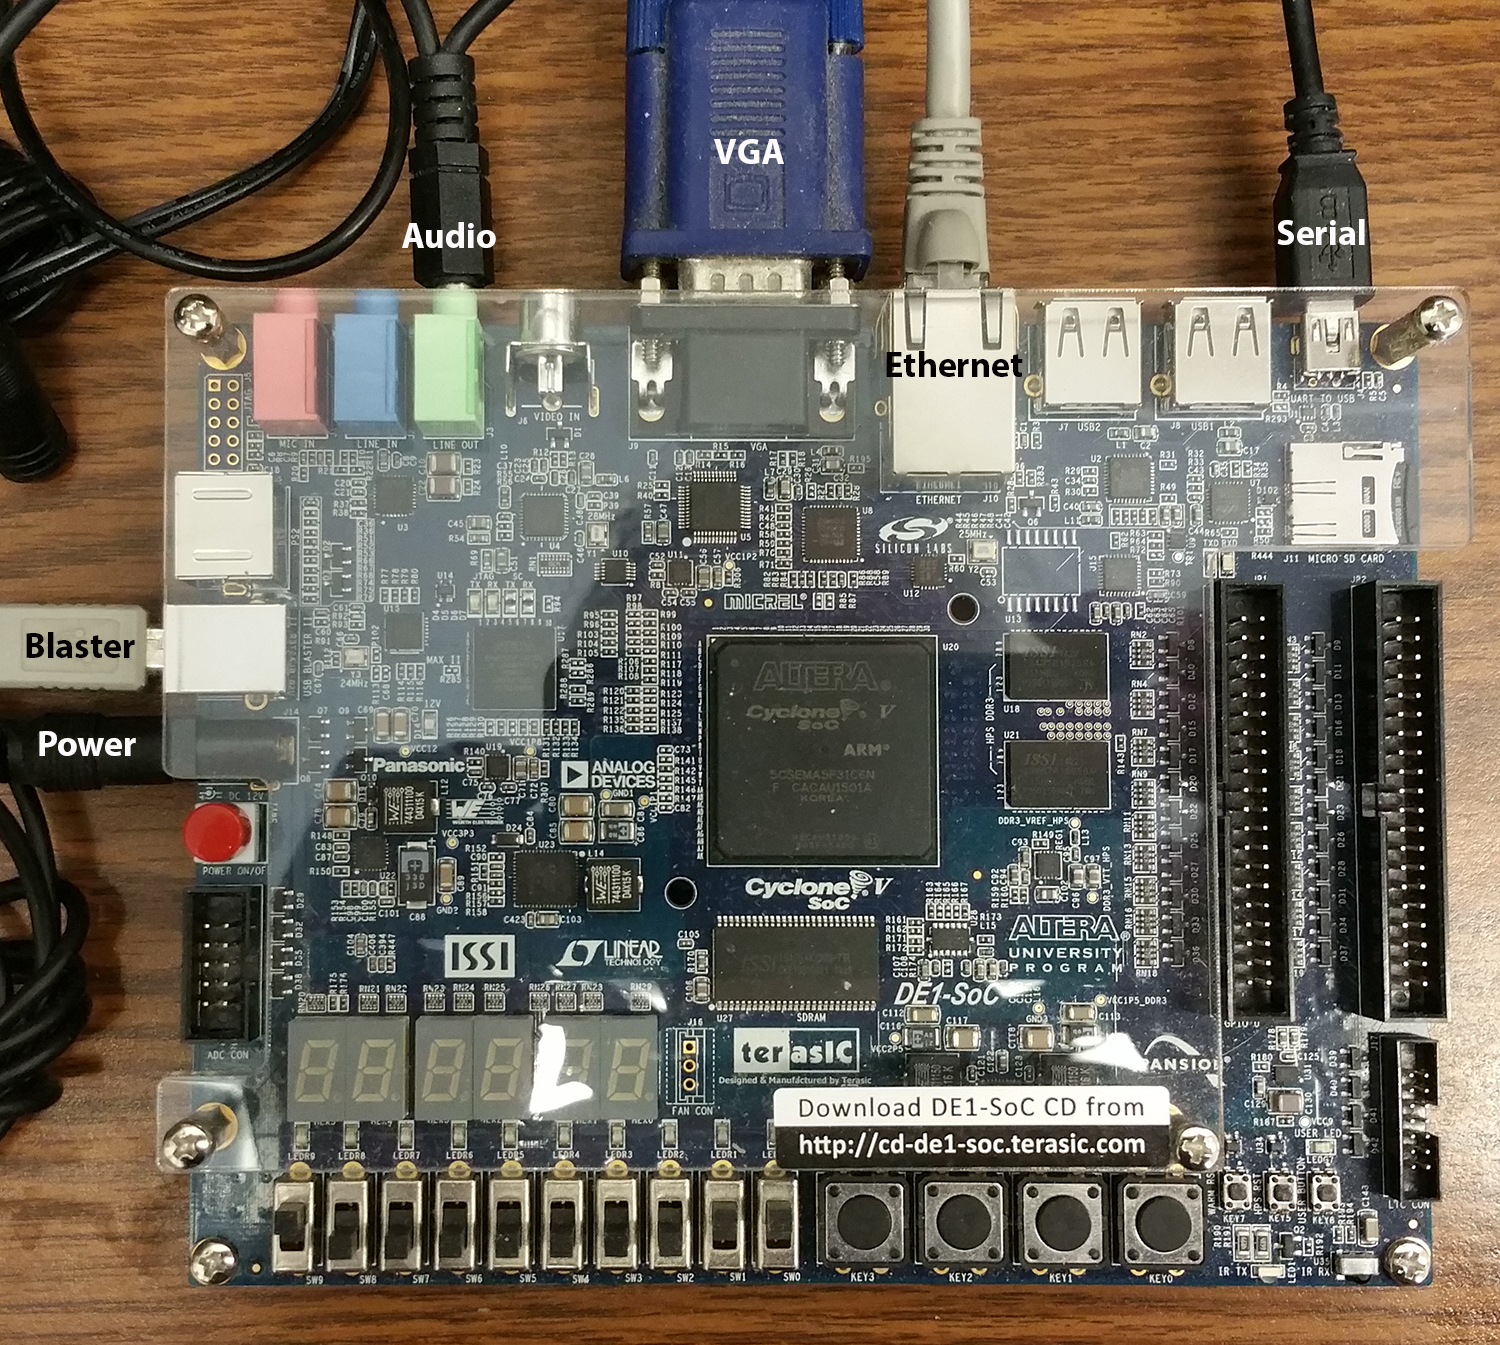
- Hook up the hardware: For most exercises there will be 5 or six connections to the board: serial, ethernet, VGA, audio (for lab 2), USB blaster, power. See the image below.
- Acquire a micro-SD card from Hunter.
- Load this Linux image onto the SD card.
- If you are working with a windows machine, The sections 2.1 and 2.2 Using Linux on the DE1-SoC shows how to install Linux on an SDcard.
- If you are on a Mac, use something like ApplePiBaker.
- Open a serial connection to the DE1 (don't boot it yet). Use baud 115200.
- Insert the SD card into the DE1.
- Boot it. You will see a bunch of text scroll past on the serial terminal.
Configuring the Linux environment
- The Cornell 10space system will be used for any FPGA on the internet in the lab.
- The Cornell 10space system is not reachable from wireless devices!
- The MAC address and IP address are locked down and must match.
- You will use a static address assigned to your group. You may not use another group's addresses.
- YOU MUST CHANGE YOUR MAC AND IP ADDRESSES. Ask Hunter for your group's MAC/IP addresses. They will be of the following form:
- IP:
10.253.17.xx - MAC:
12:34:56:78:90:yy
- IP:
- Write these down!! These are sacred to your group.
- From the serial command line, navigate to
/etc/network/interfacesand open it using a command-line editor. It will look like this:
auto eth0 iface eth0 inet static hwaddress ether 12:34:56:78:90:yy address 10.253.17.xx netmask 255.255.255.0 gateway 10.253.17.1 dns-nameservers 132.236.56.250 128.253.180.2 192.35.82.50 - Modify the address and hwaddress to match your group's assigned IP and MAC addresses.
- Save, then run
/etc/init.d/networking restart.- If you get a eth0 error, then run
reboot
- If you get a eth0 error, then run
Secure Shell Login
- From a Lab PC (or your own PC if you've VPN'd onto the Cornell network), open an ssh connection to
root@10.253.17.xx(where xx is your group's assigned IP). - The default root password is
bigred5760 - Change this password using
passwd!!
Going further
- Read the Linux on HPS page to learn how to move files to/from the HPS, and how to compile/run C using GCC.